Tuesday means…it’s time for a makeup
tutorial post!
Earlier this month, I received a big
package containing the latest of Althea Korea’s newly launched makeup products.
As an Althea Angel, I have the privilege to be the first ones to get my hand on
their latest launch and share my thoughts about them to you, my beloved readers
😊 At first I thought it’d be awesome if I
made detailed reviews for each product, but then this idea popped up in my
mind: why not creating an easy-to-follow makeup tutorial using ALL AltheaExclusive makeup products?? By creating a tutorial post like this, I can also put
in some tips and tricks about the best way to apply each product right! 😉
I know, I know. It’s been a while since the
last time I made a tutorial post in this blog. Boo me! But that’s exactly why
today I choose to create a step-by-step makeup tutorial post here instead of
creating a quick 1-minute video on Instagram or 10-minutes long, poor-edited
video on my Youtube channel. Creating pictorial (a.k.a, picture-tutorial) like
this requires dedication, lots of time and more effort in editing each of the
picture, but I do think they can come to the rescue whenever you need them! Feel
free to download and share each pictorial uploaded here but remember to always
credit me whenever you reupload or reuse the pics!! I spent hours and hours
editing each pic and I hope you enjoy what I created just for you 😉
Let’s start now, shall we?
*** Anyway, all images in this post is compressed but you can still download or save the HD version by opening it up in new tab. ***
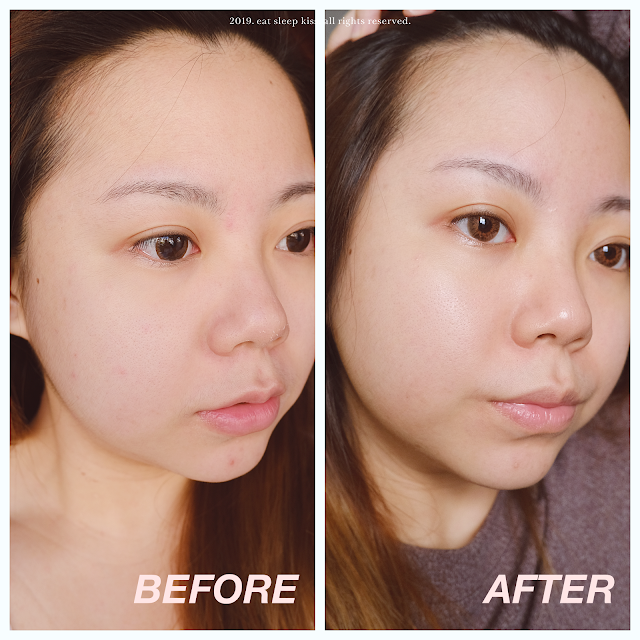
Usually I do eye makeup first, but since today
I want to focus on achieving a flawless complexion and go rather simple for the
eyes, so let’s start with the base first! My skin has been breaking out pretty
bad lately, thanks to the hormones, so I had a few pimples here and there.
Thankfully, Althea has this Skin Relief Spot Film Gel a.k.a. gel-version of acne
patch so I can cover up the big pimples first before concealing them later, to
minimize the risk of the acne getting more inflamed or swollen!
The good thing
about this product is that you can actually customize the size of the “patch” and
its thickness so it can easily be used under makeup! The adherence of the “patch”
is pretty good, but be careful when you apply it on the areas that move a lot
when you make facial expressions (such as on smile line or sides of your lips) as
the patch can easily peel off when there’s lot of movements going on!
 |
| Althea Flawless Creamy Concealer comes in a tube, with nice, slim doe-foot applicator! |
Next, I love to conceal the imperfection
first before applying foundation or BB cream, so here I’m using the AltheaFlawless Creamy Concealer. It has 4 shades in total, and I use #2 Ginger. This warm-toned
concealer shade matches my skin tone perfectly (NC 20, neutral undertone). Just
like its name, this concealer is creamy and easy to blend, but I do think the
coverage is more of a light to medium coverage, so you need to build it up to
achieve the level of coverage that you want – especially if you want to cover
big & dark blemishes or red, swollen pimples!
Now let’s move on to the eye makeup! Here I already put some dotted lines on the area where I apply the shadows on – just in case you are still a beginner in makeup world and have no idea about beauty-related terms that I’m going to use in the next few paragraphs 😉 You’re welcome!!
 |
| The gorgeous Althea x BCL Eye Palette: Sunrise & Moonrise! |
By the way, to create this eye makeup, I use
Althea x Bunga Citra Lestari Sunrise & Moonrise Eye Palette! This palette
is OH-SO-AMAZING, the quality of the shadows inside is beyond my expectation
for a regular Korean eye shadow, and girl the color payoff of each shade is
great even when I don’t wear eye primer beforehand. I’d totally recommend this
palette because of its quality and versatility!! I will create an in-depth
review about this palette in separate post so please stay tuned 😉
1 – Apply the light camel brown eye shadow on
the crease. By defining your crease, you can create an illusion of bigger eyes
and deeper eye socket!
2 – Add the medium wine red color on the
outer V and blend it in to 2/3 part of your lid. Take a new blending brush, blend
it off to the crease color!
3 – Fill the 1/3 inner part of the lid
with a shimmery light pink color from the Althea x BCL palette.
4 – To make the pink stands out even more,
I topped the pink shadow with Althea Spotlight Eye Glitter #02 Pink Light! I
love how this eye glitter can be worn on top of powder shadow and it doesn’t make
the shadow go patchy/blotchy 😉
5 – Liner game strong! Create a winged
liner with super sharp end.
6 – Add some mascara…
7 – Put on falsies…
8 - …and that’s it, you’re done! Easy and
simple eye makeup that makes people wonder how much time you spent to blend
those shadows. Hehe.
 |
| the eye makeup result! |
Last but not least, after blusher and highlighter,
it’s time for the lippie! I have to admit that I had a hard time picking which
Althea Watercolor Cream Tint shade to go with this look, but then I chose the #4
Marron Cream, my favorite color out of the bunch! Marron Cream is a nice medium
brown-red color that goes well with both dramatic or simple eye makeup.
And that’s it! Here’s the final look:
This is my version of Romantic Spring
look. The combination of pink and red shadow is so beautiful and sweet,
especially when paired with nice winged liner and long straight fake lashes.
The pink glitter topper (hey, it rhymes!) adds a touch of cuteness into this
look, making your eyes look even bigger and lively 😉
This look is so easy to recreate and can be
worn easily with different outfits for different occasion! To be honest, I’ve
recreated this look myself 3 times already and nobody seems to notice, because
it’s so versatile and I use lots of rather universal colors here 😉 That’s one of the reasons why I really
love the Althea x BCL Eye Palette and highly recommend you to get it!
***
I hope this tutorial would be useful for
you, Angels! How’d you rate this look? Please let me know if you want me to do
more tutorial post like this! Oh, and if you recreate this look – please let me
know, do tag me in your post/story so I can repost it! 😉


